As a continuation to my previous project making a simple Arduino Weather station I decided to improve upon it and build one that could not only display temperature and humidity data but also connect to the internet and publish it for logging and graphs. To accomplish this I used a development board called the ESP8266. It’s a good fit for this project as it draws little power and has a wifi chip allowing it to connect to the internet. Another upgrade is that this weather station can take readings from outdoors as it has a water resistant temperature/humidity probe.
The Wiring
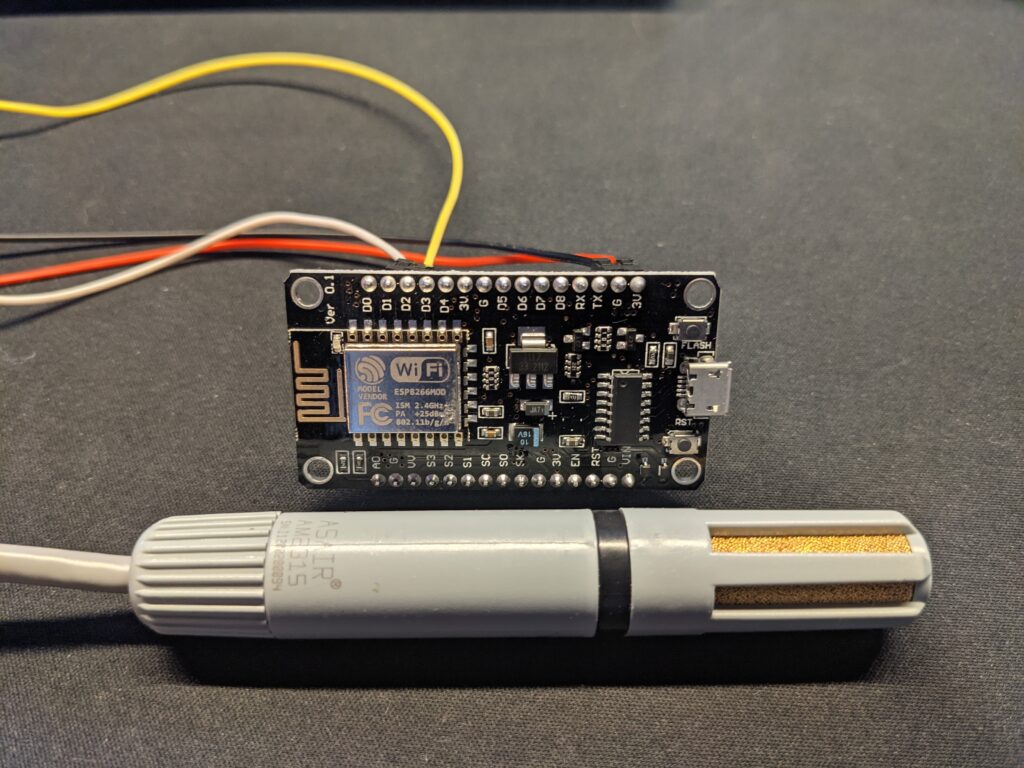
You’re going to need…
An ESP8266
An AM2315 Temperature & Humidity Sensor
And 4 female to female jumper cables
The wiring for this project is extremely simple compared to the previous one, we only need to make 8 connections.
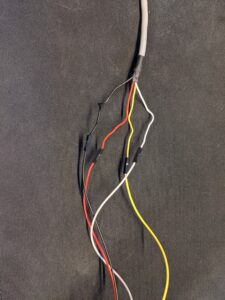
Attach one end of the 4 jumper wires to the 4 connections coming out of the AM2315 sensor
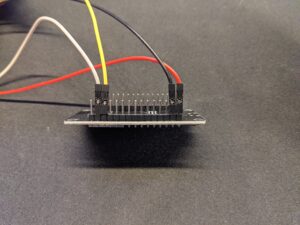
Next, plug the other ends into the ESP8266. With the red and black wires going to 3v and GND, and the white and yellow ones going to D1 and D2 respectively.
And that’s all for wiring!
The Code
The code for this project has two separate files, ESP8266Weather.ino and config.h. The first handles collecting and sending the data while the second handles wifi and publishing to Adafruit IO, the service I’m using to take in all the data. You can find the code on my GitHub repository.
Adafruit IO
To get this working for yourself you’re going to need an Adafruit IO account which you can make here. For uploading data to IO you’re going to need your key and username, to find them head over to the “My Key” section and copy your information and paste it into fields in Config.h. While you’re there you can also input your Wifi SSID (The Wifi Name) and it’s password so your board can connect to the internet.
You’ll also need to make 2 feeds on your account, feeds are what you send data to. And then you display feeds on dashboards. To make a new feed go to Feeds -> View All -> New Feed. Name one feed Temperature_AM2315 and the second one Humidity_AM2315.
Now of course, we need to make a dashboard to display them, to make one go to Dashboards -> View All -> New Dashboard. You can name it whatever you want, next, click on it and go to the settings icon on the right to create a new block. I like to use graphs so I went with the Line Chart Block, choose the temperature feed from the list and click next. Now you can customize the name and time frame, I started off with 24hrs and named mine Temperature 24hrs. Then repeat this for humidity and you’ve set up your dashboard! Finally, hook up your ESP8266 to your PC with a USB cable, choose the right com port in your Arduino IDE (Tools -> Port) and hit the upload button.
The Finished Product
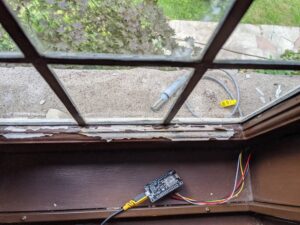
Here it is! The small wires coming out of the sensor are thin enough to fit through the side of my window so I didn’t need to put the sensitive stuff outside. I used a phone charger to power mine but you can also leave it plugged into your computer and power it that way. If you’d like to see the data that I’m collecting feel free to visit my dashboard and check it out. Thanks for reading!