I got the idea to make my own weather station with the help of an LCD, a DHT11 temperature and humidity sensor, and a 10k ohm potentiometer for contrast control on the LCD. This of course won’t be able to be sitting outside to constantly monitor as it’s not even remotely waterproof but it’s still a cool project to get some coding and general electronics experience. I do however have a plan to make one that actually sits outside, with it being able to be checked on remotely and all. Keep reading to find out how I made my own Arduino Weather Station.
The Wiring
We’ll need…
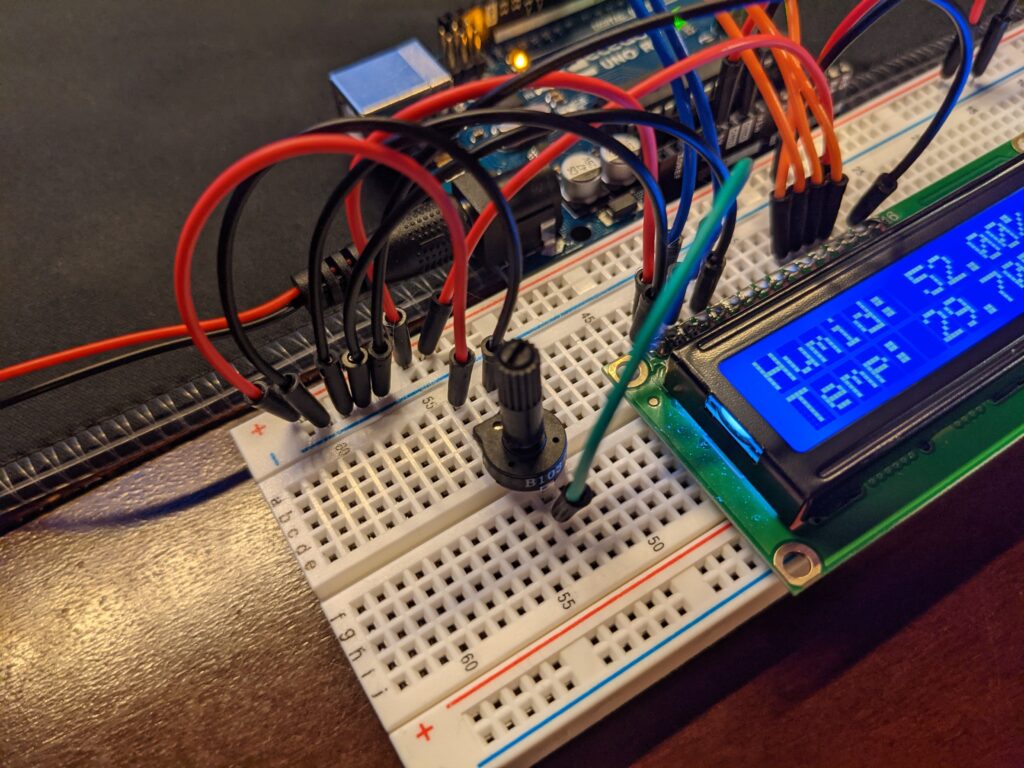
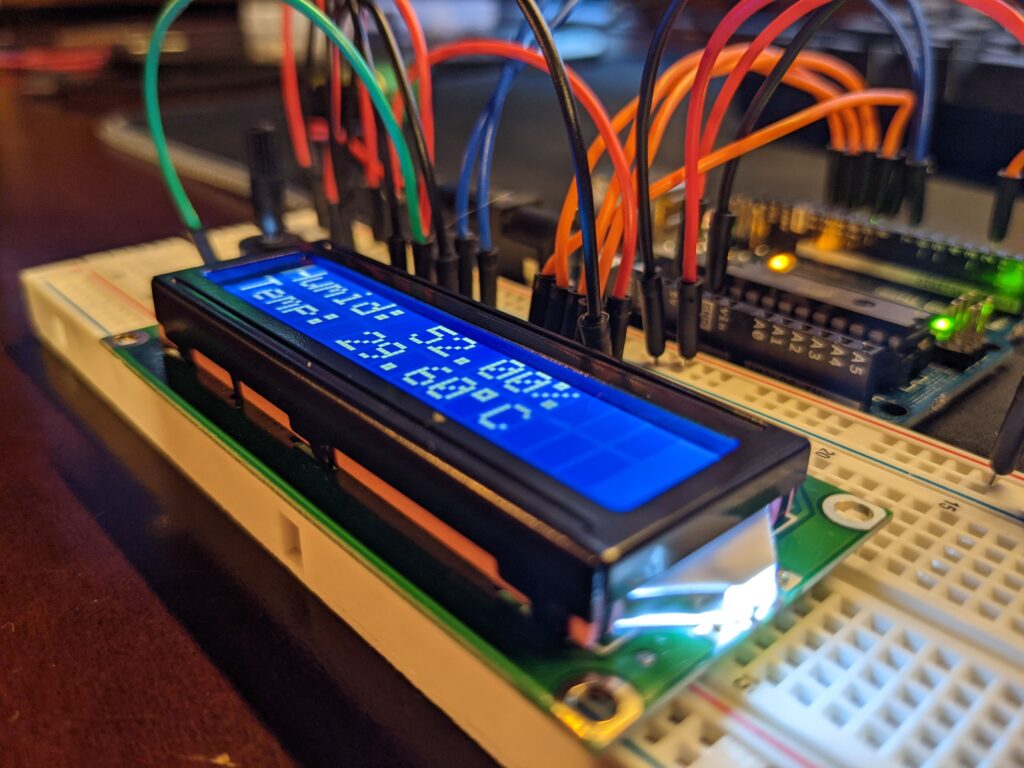
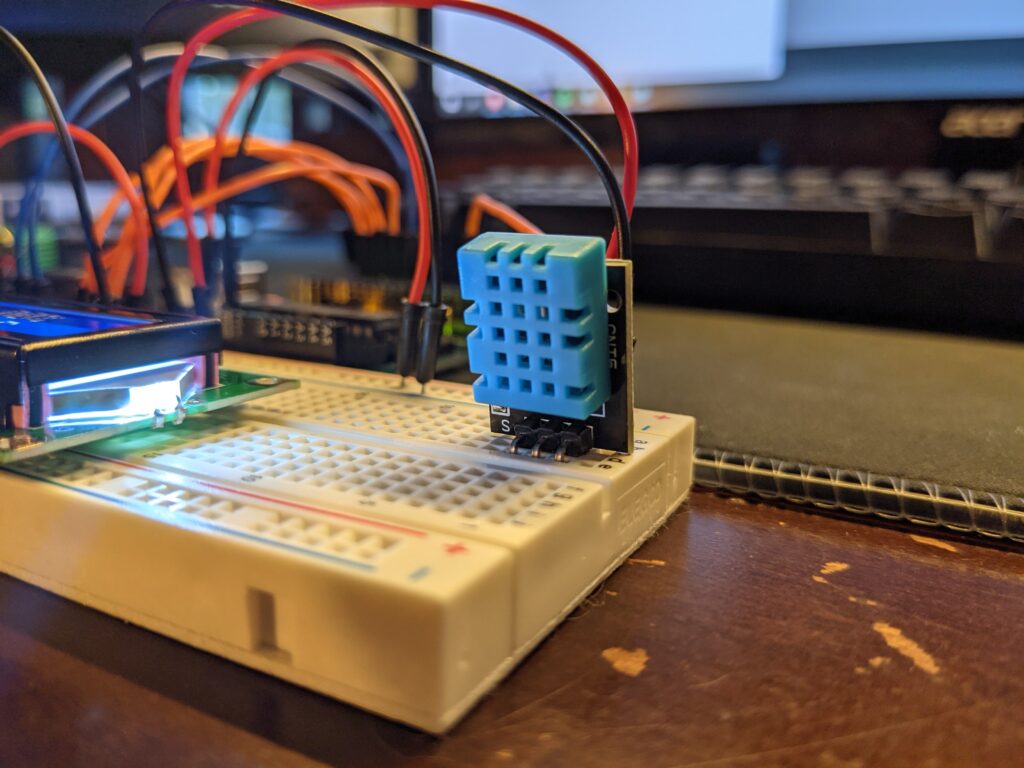
And of course the Arduino and bread board themselves. The wiring with LCD’s is a bit of a mess just because of the sheer amount of pins required to drive it. But luckily it makes wiring the DHT11 seem easier 😉
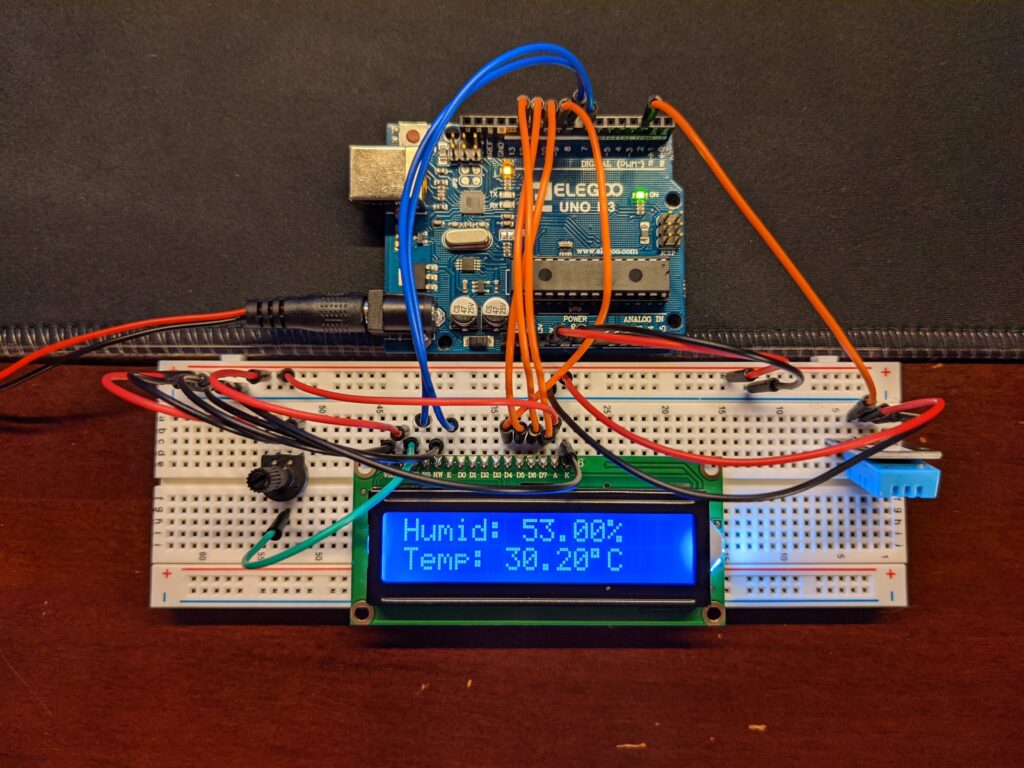
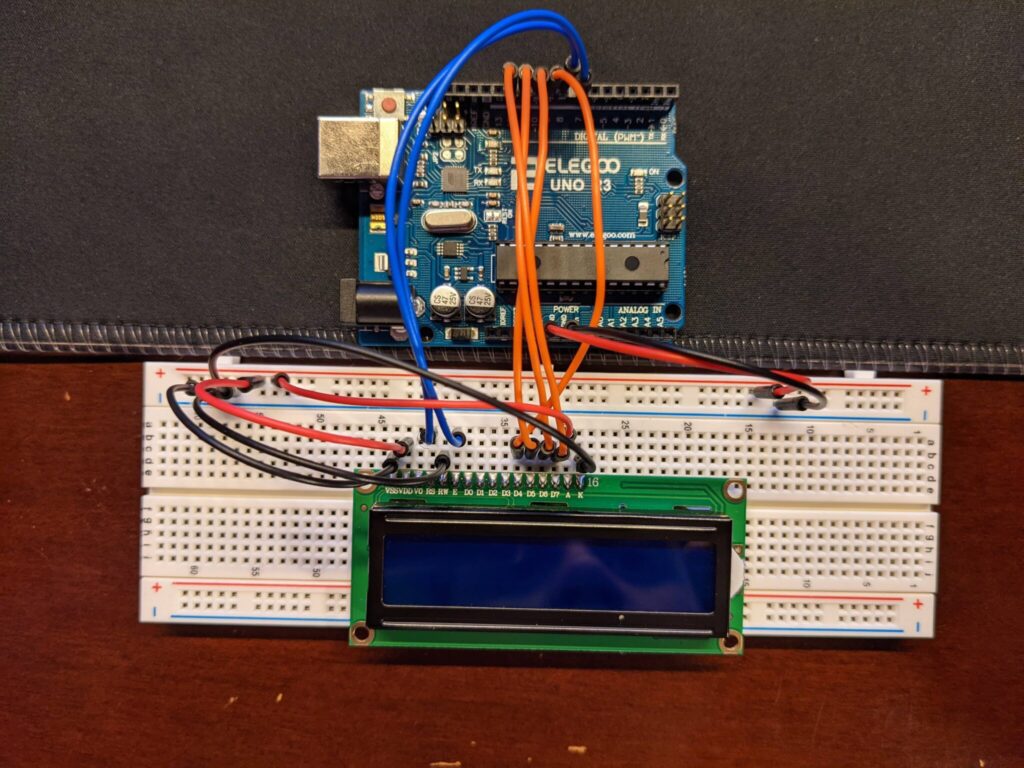
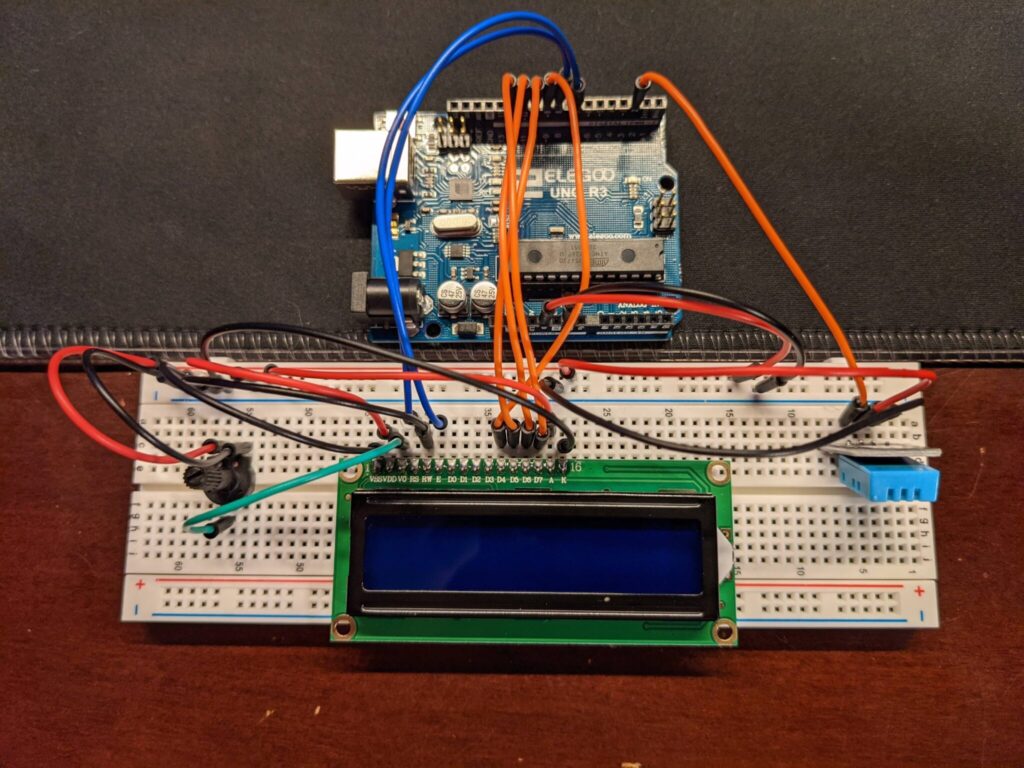
Connect the negative and positive rails on the breadboard to ground and 5v respectively. Next comes the hard part, wiring the LCD. Plug the LCD into the breadboard and connect the VSS, RW, and K prongs to ground, I did these with a black colored wire for visibility. Then connect RS to pin 7 on the Arduino, E to pin 8, D4 to 9, D5 to 10, D6 to 11, and D7 to 12. Finally hook up VDD and A to the 5v line. And that completes the wiring for our LCD. Your board should look a something like this.
Finally, let’s attach our potentiometer and DHT11
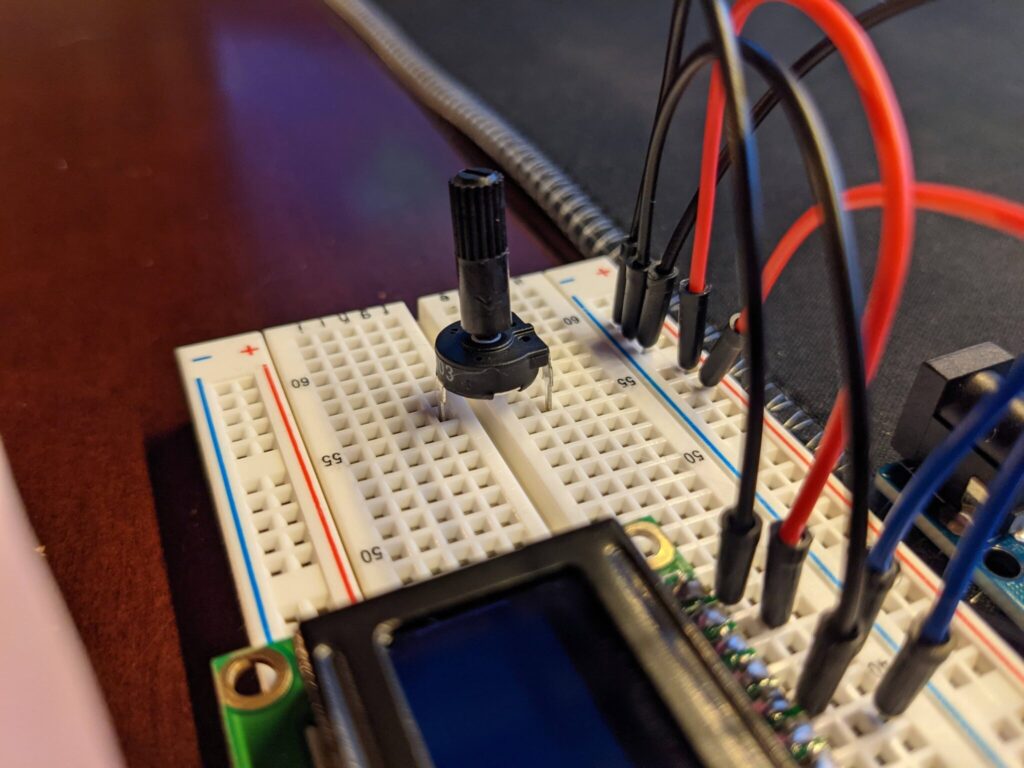
Put it in between the two halves of the breadboard, with the side with two prongs on the upper half
Next, wire the two leads to ground and 5V (the order doesn’t matter) then connect the bottom prong to the V0 pin on the LCD
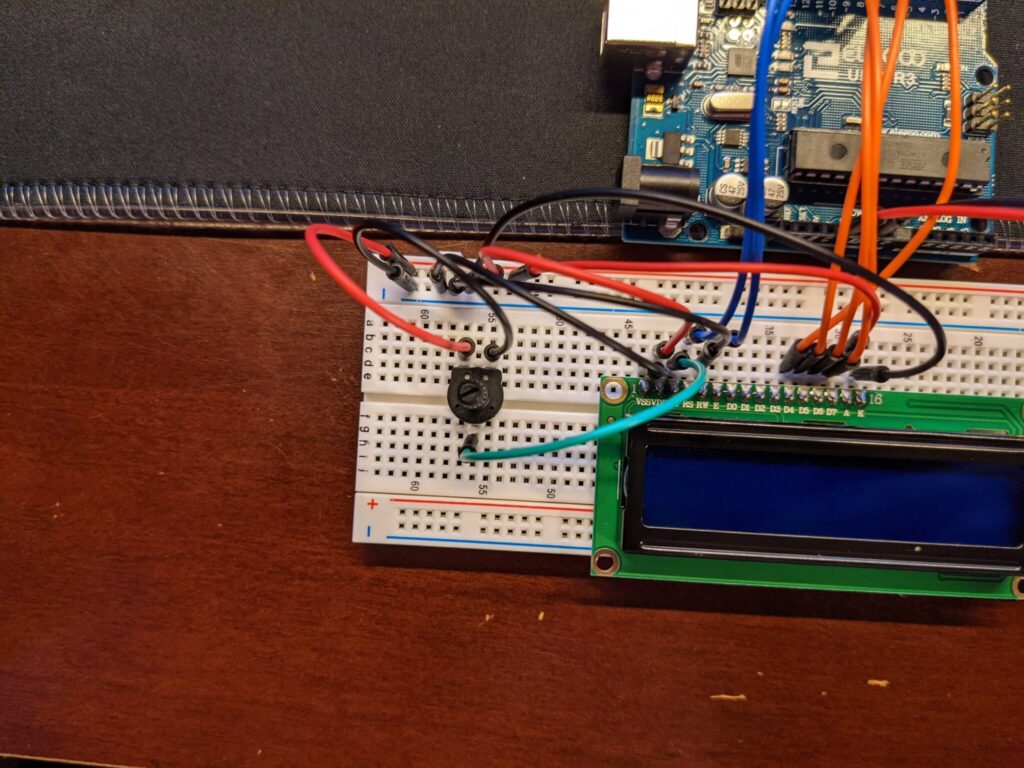
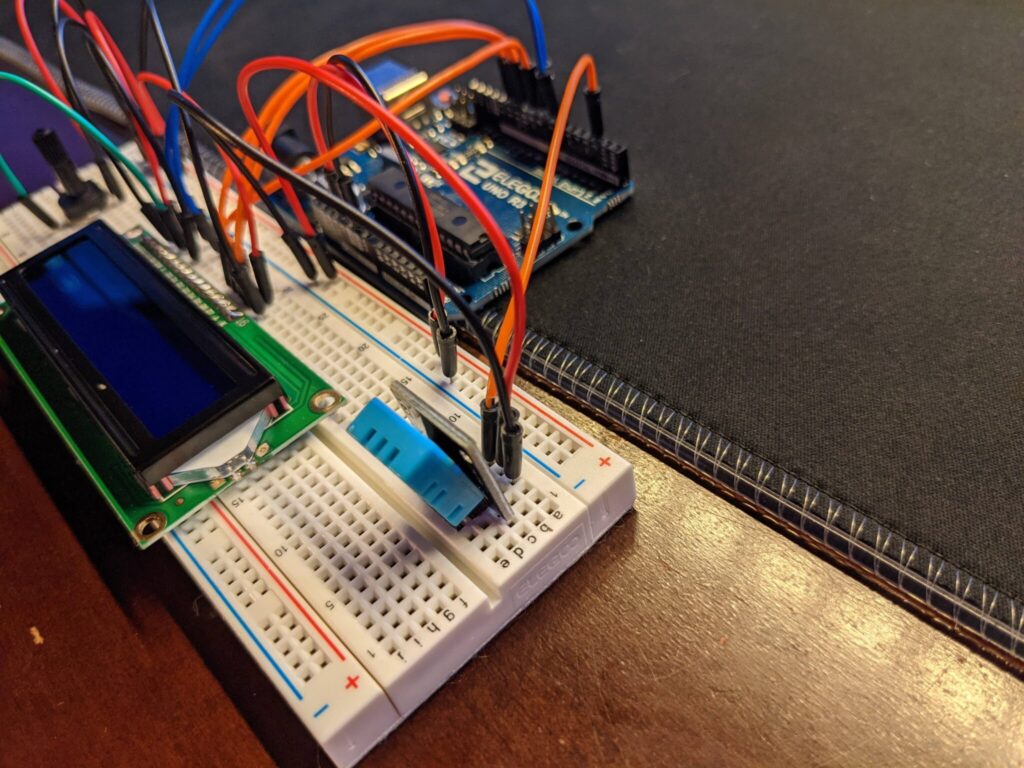
Plug the DHT11 into the breadboard and connect the leftmost prong to pin 2 on the Arduino, the middle prong to the 5V rail, and the rightmost prong to ground.
Your Breadboard should now look like this
The Code
The code for this project is pretty simple, it starts off by including the libraries needed for the LCD and DHT11. Libraries make communicating with the components easier by doing all the translation from raw input/output to simple code. Next, we startup the LCD and DHT11 and start taking readings with the floats h and t. Finally, we print these floats to the LCD, updating them every 2 seconds.
// Include Libraries
#include "DHT.h"
#include <LiquidCrystal.h>
// Define which pin is responsible for the DHT11
#define DHTPIN 2
// Define the DHT Type (There are two)
#define DHTTYPE DHT11
// Initialize the DHT11 and the LCD
DHT dht(DHTPIN, DHTTYPE);
LiquidCrystal lcd(7, 8, 9, 10, 11, 12);

void setup() {
// Start the LCD and DHT
dht.begin();
lcd.begin(16, 2);
}

void loop() {
  // Wait a little before measuring from the DHT
delay(500);

// Read the Humidity
float h = dht.readHumidity();

// Read the Temperature

float t = dht.readTemperature();

// Print the readings into the LCD
lcd.print("Humid: ");
lcd.print(h);
lcd.print("%");
lcd.setCursor(0, 1);
lcd.print("Temp: ");
lcd.print(t);
lcd.print((char)223);
lcd.print("C");
delay(2000);
lcd.clear();
}
The Finished Product
We get a fully functional weather station that gives us accurate readings for temperature and humidity.
Thanks for reading and I hope you enjoyed reading this project as much as I enjoyed making it!
Optional: Mini Version
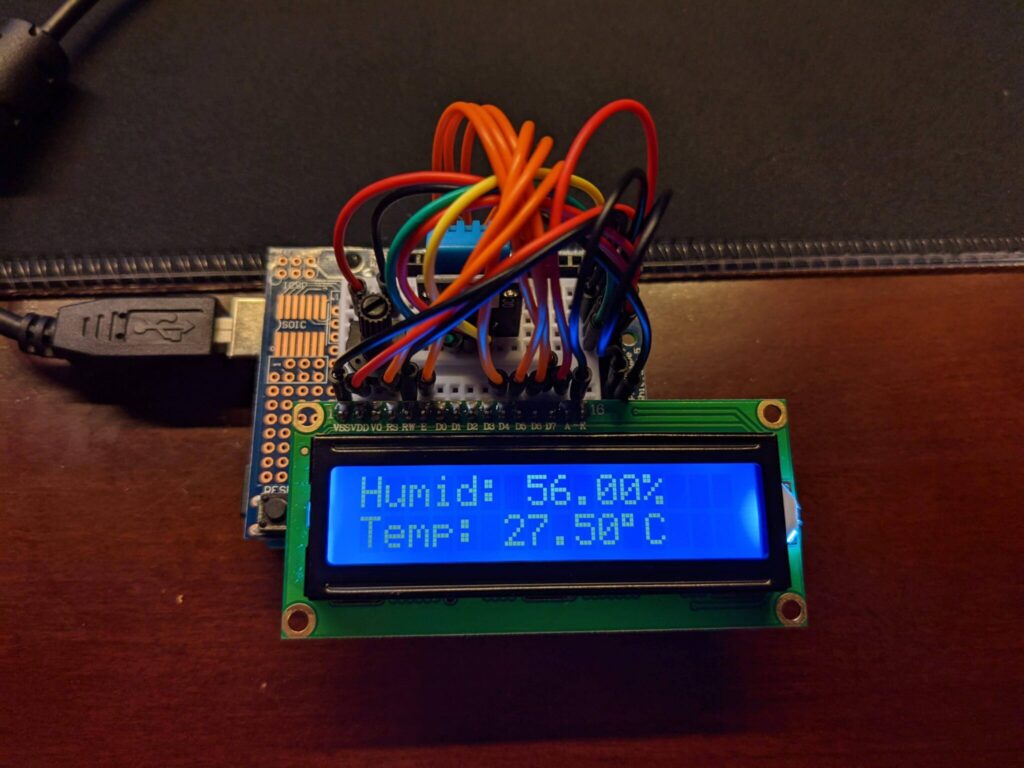
This smaller, more portable version is made on a tiny breadboard fit onto a prototyping shield. Same wiring but much harder to actually wire it up because of how tight it is. Super convenient if you’re moving around the place though, you’d only need to carry the Arduino and a battery.